
Getting a good forehand in badminton is a big deal. It’s one of those shots that can really change the game if you do it right. We’re going to break down how to get your grip and stance sorted, then move onto the swing itself, and finally, how to use it for different shots like the clear and the smash. Don’t worry, we’ll cover footwork and timing too, because that’s super important for making your forehand work.
Key Takeaways
- The right grip and stance are the starting point for a strong forehand in badminton.
- Generating power in your forehand involves using your whole body, not just your arm.
- The forehand clear is used to push your opponent back, while the smash is for attacking.
- Good footwork is needed to get to the shuttle in the right position for your forehand.
- Improving hand-eye coordination helps you time your forehand shots better.
Mastering The Forehand Grip And Stance
The Foundation Of A Powerful Forehand
Getting your grip and stance right is like building a house on solid ground. If it’s shaky, everything else you try to do will be off. For the forehand, the most common and useful grip is often called the ‘handshake’ grip. Imagine you’re meeting someone for the first time – that’s pretty much how you want to hold the racket. It feels natural, right? This grip lets your wrist move freely, which is super important for hitting different kinds of shots with power and accuracy. You want to hold the handle so your palm is behind it, with your thumb resting on the side. This gives you a good mix of control and the ability to whip the racket around.
Achieving Optimal Balance And Stability
Once you’ve got the grip sorted, your stance is the next big piece of the puzzle. Think about standing ready to receive a serve or return a shot. You don’t want to be stiff as a board, nor do you want to be wobbly. A good ready stance means your feet are about shoulder-width apart, with one foot slightly in front of the other. Your knees should be bent, and you should be leaning forward a bit, on the balls of your feet. This way, you can move quickly in any direction. It’s all about being balanced so you can react fast and hit the shuttle effectively.
Here’s a quick rundown for a solid forehand stance:
- Feet shoulder-width apart, or slightly wider.
- Knees bent, lowering your center of gravity.
- Weight balanced on the balls of your feet.
- Slight lean forward from the hips.
- Non-racket arm extended slightly for balance.
A stable stance allows for better weight transfer into the shot, making your hits more powerful. It also helps you recover your position faster after striking the shuttle.
Grip Variations For Different Shots
While the handshake grip is your go-to for most forehand shots, sometimes you need to make small adjustments. For a really powerful smash, you might naturally tighten your grip a bit and bring the racket further back. For a delicate net shot, you might loosen your grip and use more of your fingers to control the racket face. It’s not about completely changing your grip every time, but more about subtle adjustments. Think of it as fine-tuning your hold based on what you need to do with the shuttle. The key is to be able to switch between these subtle variations without losing control of the racket.
The Forehand Swing: Generating Power And Control
Alright, let’s talk about the swing itself. This is where all that practice with your grip and stance really pays off. Getting the forehand swing right isn’t just about whacking the shuttle; it’s about making it do what you want, whether that’s a screaming fast smash or a gentle drop shot. It’s a whole chain reaction, really.
Understanding The Kinetic Chain
Think of your body like a whip. The power doesn’t just come from your arm; it starts way down in your legs and core, travels up through your torso, then your shoulder, arm, and finally, the wrist and racket. Each part needs to work together smoothly. If one link in the chain is weak or out of sync, you lose power and control. It’s like trying to push a heavy box – you use your legs and your whole body, not just your arms.
The Role Of Arm And Forearm Rotation
This is a big one. A lot of players focus too much on just swinging their arm. But the real magic happens with the rotation of your forearm and wrist. When you’re about to hit the shuttle, your forearm rotates outwards (supination) and then snaps inwards (pronation) at the moment of impact. This is what gives the shuttle that extra zip. It’s not just a flick; it’s a controlled, explosive twist.
- Legs: Bend knees, push off.
- Torso: Rotate hips and shoulders.
- Shoulder: Rotate forward.
- Arm: Extend towards the shuttle.
- Forearm/Wrist: Snap through for power.
Maximizing Racket Head Speed
So, how do you get that racket head moving super fast? It’s all about timing and technique. You want to keep the racket head ‘lagging’ behind your hand during the backswing and then let it whip through at the last second. This creates a much faster swing than if you just moved your arm in a big circle. Think about it like cracking a whip – the handle moves, but the tip moves much faster.
The goal is to make contact with the shuttle at the highest possible point in front of your body, with your arm extended and your forearm snapping through. This combination transfers maximum energy to the shuttle, resulting in both speed and accuracy.
Here’s a quick look at how different parts contribute to racket head speed:
| Body Part | Contribution to Speed | Notes |
|---|---|---|
| Legs & Core | Initial Momentum | Provides the base for the entire motion |
| Shoulder Rotation | Transfer of Energy | Connects torso power to arm movement |
| Arm Extension | Reach and Leverage | Maximizes the arc of the swing |
| Forearm/Wrist Snap | Final Acceleration | The critical element for peak racket speed |
Executing The Forehand Clear
The forehand clear is a shot every badminton player needs in their toolkit. It’s your go-to for pushing your opponent back to the far corners of the court, giving you time to reset or setting up your next move. Think of it as a strategic reset button, but one that can also put your opponent on the defensive. Mastering this shot means understanding when and how to use its different variations.
Positioning For The Forehand Clear
Getting into the right spot before you even swing is half the battle. You want to be positioned so you can hit the shuttle at a comfortable height, ideally in front of your body. This usually means moving sideways to get your body aligned with the shuttle’s path. A good stance involves having your non-racket arm extended for balance and your weight slightly forward. Proper footwork here is key to generating power and maintaining stability.
The Defensive Clear Technique
When you’re under pressure and need to buy time, the defensive clear is your best friend. The goal here is to send the shuttle high and deep into your opponent’s backcourt. You’re not trying to win the point outright with this shot, but rather to give yourself a chance to recover your position on the court. To execute it, you’ll want to hit the shuttle with an upward angle, making sure it has enough height to clear your opponent’s racket and land deep. It’s all about getting that high trajectory.
The Attacking Clear Technique
This is where the clear gets a bit more aggressive. The attacking clear is hit with a flatter, faster trajectory than the defensive clear. The aim is to catch your opponent off guard, forcing them to move quickly and potentially make a weak return. You’ll still want to hit it deep, but with less arc. This shot requires good timing and a bit more power behind it. It’s a great way to transition from defense to offense, or to keep your opponent from getting too comfortable at the net. You can find more on backcourt shots that utilize similar principles.
Here’s a quick breakdown of what to focus on:
- Body Alignment: Get sideways to the shuttle.
- Contact Point: Hit the shuttle in front of your body.
- Trajectory: High and deep for defensive, flatter and faster for attacking.
- Power Source: Use your legs and core, not just your arm.
The forehand clear, whether defensive or attacking, relies heavily on good court positioning and a solid swing. Don’t underestimate its importance in controlling the rally and dictating play. It’s a shot that separates players who just hit the shuttle from those who play strategically.
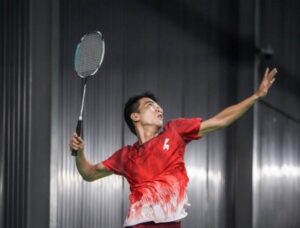
The Forehand Smash: Your Offensive Weapon
Preparation For The Forehand Smash
Getting ready for a smash is more than just swinging. It starts way before you even think about hitting the shuttle. You need to be in the right spot, usually behind the baseline, and have your racket up and ready. Think of it like a coiled spring. Your body should be sideways to the net, with your non-racket arm extended up for balance. This setup is key to getting the power you need. A good forehand grip is a must here, just like for any other forehand shot.
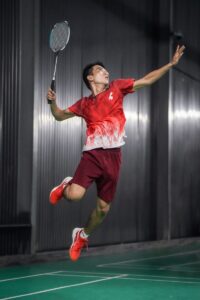
The Wind-Up And Strike Phases
This is where the magic happens. As the shuttle comes down, you’ll move your back foot forward and start rotating your hips. Your arm and forearm will supinate, meaning they turn outwards, and your elbow and shoulder pull back. This whole sequence builds up the energy for the strike. Then comes the explosive part: your forearm pronates rapidly, your arm extends fully, and you make contact with the shuttle. You want to hit it high and slightly in front of your hitting shoulder, driving it downwards. It’s a fast, coordinated movement that requires practice.
Follow-Through For Maximum Velocity
Don’t stop moving right after you hit the shuttle! The follow-through is just as important for getting the most out of your smash. Keep that forearm rotation going and maintain the racket’s path in front of your body. This helps transfer all that energy efficiently. You’ll naturally land on your back foot and then step forward with your front foot. This motion helps you recover your balance and get ready for whatever your opponent does next. It’s all about keeping the momentum going and staying in the game. Mastering the forehand smash takes time, but focusing on these phases will get you there.
Footwork For The Forehand In Badminton
Moving around the court efficiently is just as important as your swing. Without good footwork, even the best forehand technique won’t get you to the shuttle in time. It’s all about getting your body in the right place, at the right time, with the right balance.
Essential Footwork Patterns
Think of footwork as the engine for your forehand. It’s not just about running; it’s about controlled, explosive movements. The basic sequence usually starts with a split step. This is a small hop you do just as your opponent is about to hit the shuttle. It gets your legs ready to spring in any direction. From there, you’ll use different steps to get to the shuttle. For shots in front of you, a lunge is common. For shots further back, you might use chasse steps (side-steps) or even a controlled run backwards. The goal is always to end up in a stable, balanced position to execute your shot.
Here’s a typical flow:
- Split Step: A quick hop to prepare for movement.
- Approach: Moving towards the shuttle using appropriate steps (lunge, chasse, run).
- Strike: Reaching the optimal position to hit the shuttle.
- Recovery: Quickly returning to a ready stance near the center of the court.
Adapting Footwork To Court Zones
Your footwork needs to change depending on where the shuttle is. If it’s near the net, you’ll likely be doing a forward lunge, keeping your body low. For a forehand clear hit from the back of the court, you might take a few chasse steps backward to get under the shuttle, then push off to hit it. If the shuttle is wide, you’ll need to move sideways quickly. It’s about adjusting your stride length and direction based on the shuttle’s position and the type of shot you need to play.
| Court Zone | Common Footwork Movement | Purpose |
|---|---|---|
| Forecourt | Forward Lunge | Reach shuttle near net, maintain balance |
| Midcourt | Chasse Steps, Small Steps | Quick adjustments, balanced hitting |
| Backcourt | Backward Run, Chasse | Get under high clears, generate power |
Integrating Footwork With Stroke Execution
Footwork and stroke are a team. You can’t just swing wildly; your feet need to set you up. For a forehand clear, for example, you’ll move back, get your feet set, and then use your body rotation, initiated by your hips and legs, to power the shot. For a forehand smash, you might move into position, perhaps even jump, to get the shuttle high and hit it downwards with maximum force. The recovery step is just as vital; getting back to the center quickly means you’re ready for your opponent’s next shot. It’s a continuous cycle of movement, hitting, and returning to ready.
Developing Hand-Eye Coordination For Forehands
Okay, so you’ve got the grip down, you’re standing right, and you’re starting to get a feel for the swing. But what about actually seeing the shuttle and hitting it where you want it to go? That’s where hand-eye coordination comes in, and for forehands, it’s a big deal. It’s not just about swinging hard; it’s about swinging smart, and that starts with your eyes and hands working together like a well-oiled machine.
Anticipating Shuttle Trajectory
This is like being a detective for the shuttlecock. You’re not just watching it fly; you’re trying to figure out where it’s going before it gets there. Think about it: the shuttle doesn’t just go in a straight line. It dips, it floats, it can curve a bit. Your brain needs to process all this visual information super fast. The better you can predict where the shuttle will be, the more time you have to get your racket in the right spot. It’s a skill that gets better with practice, honestly. You start noticing patterns, like how a certain flick of the opponent’s wrist usually means a drop shot, or how a full swing often leads to a clear.
Timing Your Strike For Precision
Once you know where it’s going, you have to hit it at the right moment. This is where timing is everything. Hitting the shuttle too early or too late can completely mess up your shot, even if your swing is technically perfect. For a forehand, you want to make contact when the shuttle is in front of you, usually at a comfortable height. If you’re reaching too far or hitting it when it’s already dropped too low, you lose a lot of power and control.
Here’s a quick breakdown of timing considerations:
- Early Contact: Can lead to shots going too far or being uncontrolled.
- Ideal Contact: Usually in front of your body, at a comfortable hitting zone.
- Late Contact: Often results in weak shots, or hitting the shuttle below net height.
Improving Shuttlecock Control
This is the payoff. When your hand-eye coordination is sharp and your timing is spot on, you gain control. You can place the shuttle where you want it – deep in the back, short at the net, or angled to the sides. It’s about finesse, not just brute force. You learn to use the racket face to guide the shuttle, adjusting the angle and the force of your swing. It’s a subtle art, really. You might practice hitting specific targets on the court, or try to keep the shuttle in play for as long as possible during rallies. This kind of focused practice really sharpens your ability to control the shuttle with your forehand.
Developing this connection between what your eyes see and what your hand does takes time and repetition. It’s not something you master overnight. Think of it like learning to juggle; at first, it’s all dropped balls and frustration, but eventually, it starts to click, and you can keep multiple objects in the air smoothly. Badminton is similar – the more you practice reading the shuttle and timing your swings, the more natural and controlled your forehand shots will become.
Putting It All Together
So, we’ve gone over a lot about the forehand, from how to hold the racket just right to making sure your feet are in the best spot. It might seem like a lot at first, but remember, it all comes down to practice. Don’t get discouraged if your shots aren’t perfect right away. Keep at it, focus on one thing at a time, and you’ll start to see a difference. Getting that forehand solid is a big step, and with a bit of work, you’ll be hitting those powerful shots and controlling the game before you know it. Just keep swinging!
Frequently Asked Questions
What is the most important part of a badminton forehand?
The grip is super important! It’s like the steering wheel for your racket. A good grip helps you control the shuttle and hit it with more power. Think of it as the first step to making your forehand awesome.
How can I hit the shuttlecock harder with my forehand?
To hit harder, you need to use your whole body, not just your arm. It’s like a chain reaction! Start with your feet, twist your body, then swing your arm and wrist really fast. This makes your racket hit the shuttle with a lot more speed.
What’s the difference between a defensive and an attacking forehand clear?
A defensive clear is hit really high and deep to give you time to get back in place. An attacking clear is flatter and faster, trying to catch your opponent off guard. Both send the shuttle to the back, but with different goals.
How do I perform a forehand smash correctly?
For a smash, get ready high above your head. Then, twist your body, swing your arm down fast, and hit the shuttle hard. Make sure to follow through with your swing to get the most power. It’s your best shot for winning points!
Why is footwork so important for forehand shots?
Good footwork helps you get to the shuttle in the best spot to hit it. It’s like moving to catch a ball. You need to be in the right place at the right time to make a strong and accurate forehand shot. It also helps you get back to your starting spot quickly.
How can I get better at timing my forehand shots?
Getting better at timing means practicing a lot and learning to watch the shuttle closely. Try to hit the shuttle when it’s at its highest point, or where you want it to go. The more you practice, the better you’ll get at knowing exactly when to swing.